Circuit-Zone.com - Electronic Projects
Posted on Friday, May 20, 2011 • Category: LED
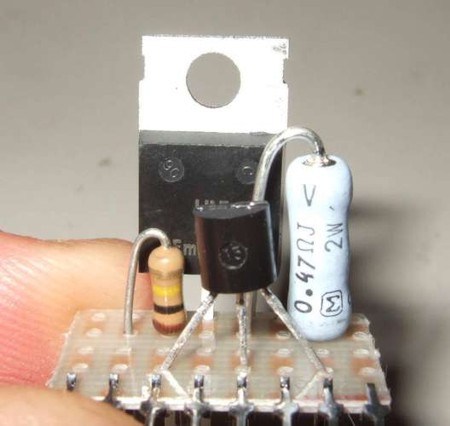
Here's a really simple and inexpensive Power LED driver circuit. The circuit is a "constant current source", which means that it keeps the LED brightness constant no matter what power supply you use or surrounding environmental conditions you subject the LED's to.
Or to put in another way: "this is better than using a resistor". It's more consistent, more efficient, and more flexible. It's ideal for High-power LED's especially, and can be used for any number and configuration of normal or high-power LED's with any type of power supply.
As a simple project, i've built the driver circuit and connected it to a high-power LED and a power-brick, making a plug-in light. Power LED's are now around $3, so this is a very inexpensive project with many uses, and you can easily change it to use more LED's, batteries, etc.
Posted on Friday, May 20, 2011 • Category: PIC
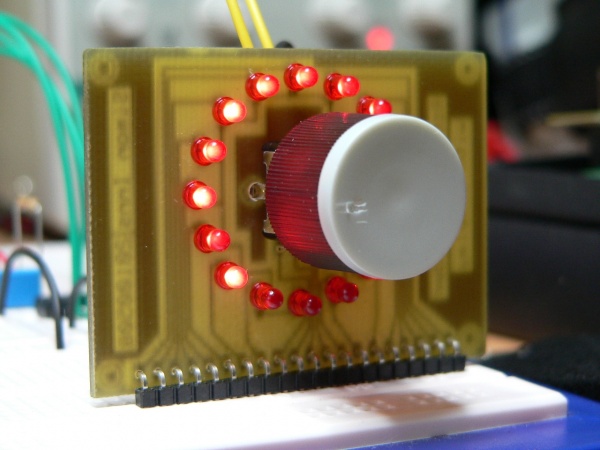 Rotary encoders are very versatile input devices for microcontroller projects. They are like potentiometers expect of digital nature and unlike analogue potentiometers they never wear down. Rotary encoders not only provide 360 degrees of rotational freedom they also allow digital positioning information to be gained without the use of analogue to digital converters (ADCs). When using rotational encoders in projects it's possible to use the same encoder to represent a number of different input types, however this requires some form of feedback display to let the user know what information he is inputting and the 'position' of the encoder. The project is based around a 24 position rotary encoder, 16 LEDs arranged in a circle around the encoder, an A6276 16 LED serial driver IC and the PIC182550 microcontroller. A rotary encoder has 3 pins usually called A, B and C. The C pin (which is normally the centre pin) should be grounded and both A and B should be connected to the microcontroller with individual pull-up resistors on each input. In this project I used RB4 and RB5 on the PIC to connect the encoder; this has 2 advantages, firstly you can use the PORTB internal weak pull-up (which means you do not need external resistors) and also the PIC provides an 'interrupt-on-change' which can be used to monitor the encoder.
Posted on Friday, May 20, 2011 • Category: Sensors
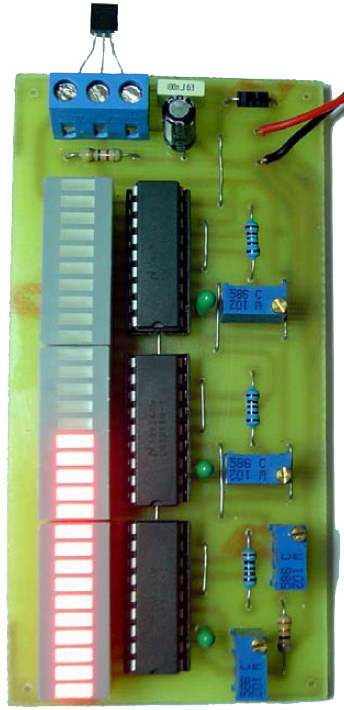 As shown in the schematic, temperature sensor of our electronic thermometer is LM35DZ. There are some kinds of LM35 IC, since it is cheap and easy to find we used LM35DZ in our project. It measures from 0°C to 100°C with a very linear output graph.For one degree change, it increases its output 10mV. On the Electronic Thermometer Schematic other hand, this circuit measures temperature values only between +10°C and +39°C.
2 numbered (middle) pin of the sensor is connected to the 5 numbered pins of LM3914 ICs. So every IC determines how many leds of bargraph will bright due to the analog signal received from the sensor. 2.2 microfarad tantal capacitors are connected between the 2 and 3 numbered pins of LM3914. Resistors in the circuit have %1 tolerance values.
Posted on Thursday, May 19, 2011 • Category: Amplifiers
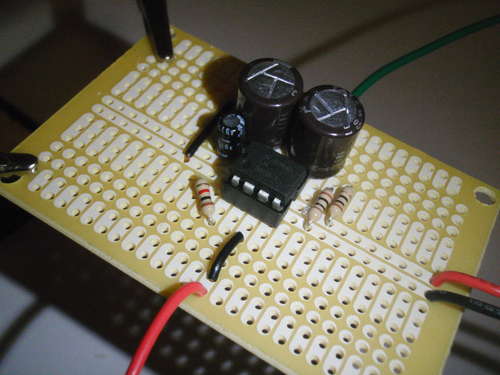 This project shows how to build an Audio amplifier based on LM386 IC. The circuit is very simple and construction is easy on a breadboard.
The LM386 IC is unique in that the gain can be modified by changing Resistor R2 and Capacitor C2. This configuration will give us a gain of 20. By removing R2 and connecting C2 across pins 1 and 8, we can increase the gain to 200. It is important to understand that increasing the gain does not increase the output power. The increased gain is only used when a very low input signal is to be amplified.
In a previous article I discussed building audio amplifiers using discrete transistors. While it is possible to build good audio amplifiers from discrete transistors, they are no match for the many audio amp IC's available to us. IC's offer many advantages including high efficiency, high gain, low standby current, low component count, small size and ,of course, low cost. It is little wonder that audio amp IC's have replaced discrete transistors in most consumer electronic devices. While many experimenters have stayed away from these little black mysteries, I am going to uncover some of their secrets and demonstrate how easy they are to use.
Posted on Thursday, May 19, 2011 • Category: Amplifiers
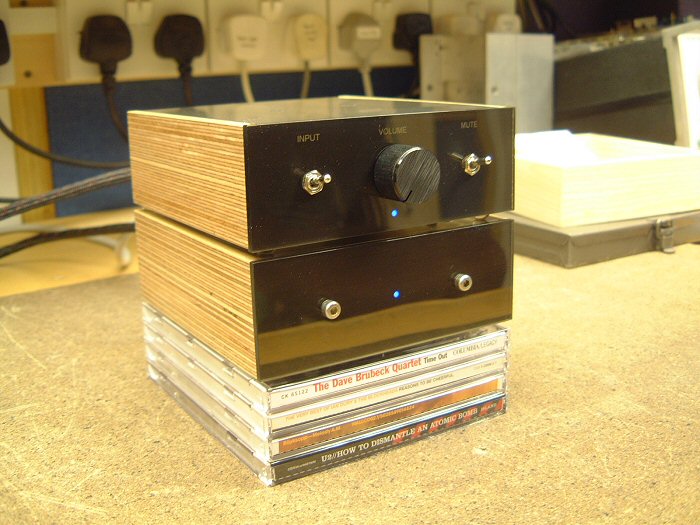 Having decided to build an ultra-compact design, using a spare LM4780 seemed like an obvious plan. Having said that, I might choose a different IC if I didn't already have one to hand. The LM4780 contains two LM3886 dies (reference) giving 60 watts per channel, which is rather more than required this application. National Semiconductor make an enormous range of IC's with differing power levels and configurations, and there are plenty of possible candidates for this application - after all, we only need a few watts as this amplifier will principally be driving small speakers on the computer desk.
Posted on Wednesday, May 18, 2011 • Category: LED
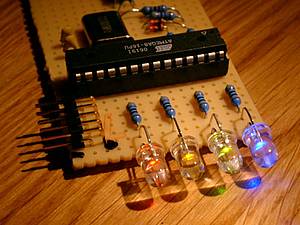 The USB-LED-Fader is a device to control a number of LEDs via USB. I built it to display the online status of my internet connection, the recording status of my video recorder (VDR), and warnings if the available disk-space is low. You can imagine an endless number of applications for this.
The LEDs are controlled with pulse width modulation (PWM). That way, they are not only on or off, it is possible to control the brightness. Included in the device are a number of 'waveforms' that can be displayed through the LEDs. That way, one LED can display some kind of a sine- or triangular wave without any interaction with the controlling host.
Every LED can be controlled individually; each one can display its own waveforms.
Posted on Wednesday, May 18, 2011 • Category: Test and Measurement
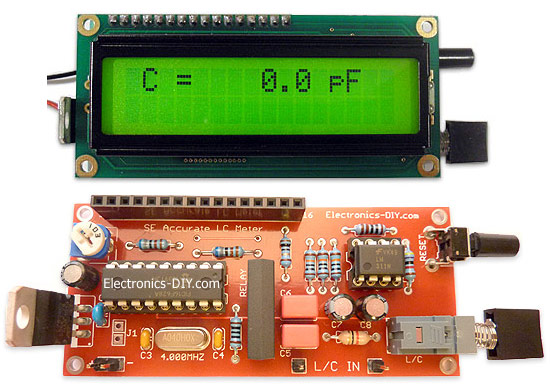 Build your own Special Edition Accurate LC Meter (Inductance Meter / Capacitance Meter) and start making custom made precision coils and inductors. Accurate LC Meter allows to measure incredibly small inductance making it perfect tool for making all types of RF coils and inductors. It can measure inductance starting from only 10nH - 1000nH, 1uH - 1000uH, 1mH up to 100mH and capacitance from 0.1pF up to 900nF.
Special Edition LC Meter includes top notch high precision components that are only found in premium quality kits. It includes high quality double-sided printed circuit board (PCB) with red solder mask and pre-soldered tracks for easier soldering, detachable LCD display with yellow-green LED backlight, programmed PIC16F628A microcontroller chip, high precision capacitors and inductor, 1% Metal Film resistors, Machined IC Sockets, gold plated header pins, LCD header connectors and all the other components that are needed to build a premium quality kit. Thanks to the use of LCD connectors LCD display can be detached from the main PCB board at any time even after the kit has been assembled. All components are through-hole and are easy to solder. Special Edition Accurate LC Meter is designed for professionals that require unprecedented measurement accuracy and offers great value at low cost.
Posted on Tuesday, May 17, 2011 • Category: Test and Measurement
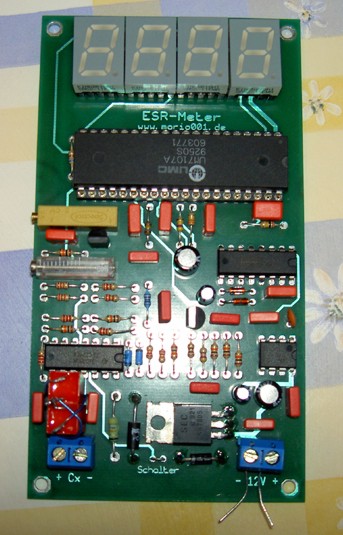 This ESR Meter is perfect for any electronics repair technicians, engineers or hobbyist. This handy ESR meter measures electrolytic capacitor equivalent series resistance (ESR) in the circuit. ESR is a very important characteristic of capacitors greater than 1 microfarad. This meter makes measurements which are often impossible to check with standard digital capacitance meters. This ESR meter is based around ICL7107, 4049, NE555 and TLC274 operational amplifier and can measure resistance from 0.01 Ohm up to 19.99 Ohm. ESR value is displayed in Ohm on four digit LED display . The power consumption is only 8mA using 12V battery. ESR Meter offers very simple design and is easy to assemble.
Posted on Tuesday, May 17, 2011 • Category: FM Radio / Receivers
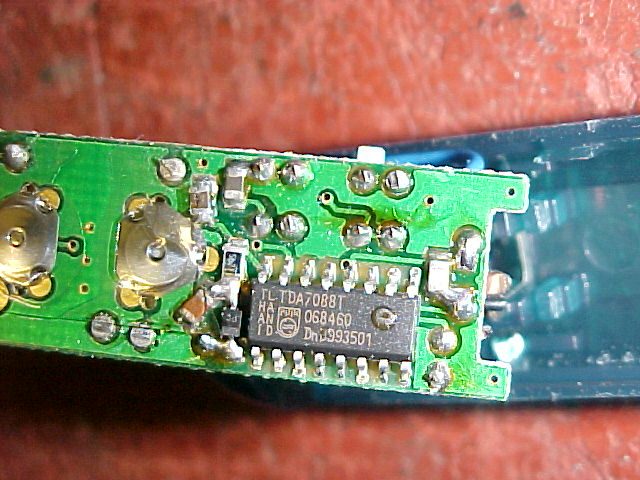 This tiny receiver is not much bigger than an AA cell. It is powered off two LR44 button cells, which are expensive and I assume wouldn't last terribly long. I'll be on the lookout for LR44's at the markets and $2 shops now that I've got this radio! As with all these sorts of radios, the headphone lead functions as the aerial. Supplied with this receiver were a pair of those awful "in-the-ear" type of miniature type earphones. Apart from the appalling sound quality, they are insensitive, unhygenic and dirty, fragile, and do not block out external sounds. So, I use the normal kind of headphones instead.
The enclosure is all clipped together, and once I'd opened it, sure enough, a TDA7088T was visible.
The audio amp appears to be one transistor; ie. single ended class A. I don't know what current it's drawing so I can't say whether it's consuming much more battery current than a class B amp would. In any case I would prefer AAA cells rather than the LR44's.
Posted on Tuesday, May 17, 2011 • Category: Power Supplies
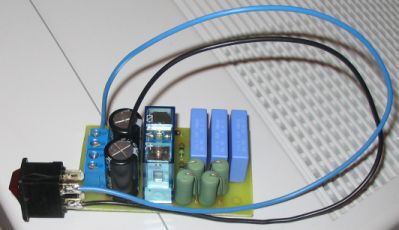 The circuit will limit the current through the supply wires to 5.5A for about 1.5sec. After that time the relay will close and the current flow won't be restricted anymore. This is a very interesting circuit if you have a large toroid with big electrolytic caps connected to the power supply, since these will act like short circuits for a small amount of time if they start charging. This unit is a delay unit that can be connected directly to the mains power supply. It´s not obligatory to use one but it is a good idea, specially if you have a big toroidal transformer larger than 300 VA. This unit has a delay circuit and for the delayed time the mains power is supplied through power resistors minimizing in this way the big inrush current due to big capacitors and big toroidal transformers in the power supply. When everything is stable it shorts the power resistors and supplies the mains power directly.
Circuit-Zone.com © 2007-2025. All Rights Reserved.
|